How to Change A Camera Strap from Drab to Fab
March 3, 2015 - Posted By Emma Brassfield
With the weather getting warmer and the flowers starting to pop up, there are more and more reasons to take out your camera. However, the straps you can buy from shops are so drab and dreary! Why not brighten up your camera and express your creative personality with this easy to follow DIY camera strap tutorial?
It's the perfect beginner sewing project -- review the stitch instructions (included) and you are good to go.
You will soon be making the perfect gift for yourself, your favorite photographer, or even whipping up some to sell at craft fairs and in your online marketplace!
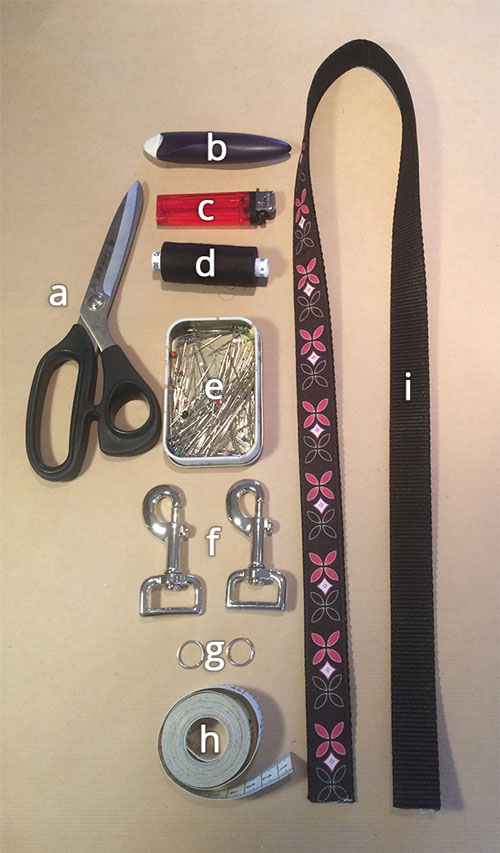
You will need:
- Scissors
- Chalk or fabric marker -- you can also use a pin if you don't have chalk. Chalk is great though as it rubs away.
- Lighter or matches
- Thread -- try to match the ribbon on webbing.
- Pins -- glass-headed are a little easier to work with as the webbing can be tough.
- (2) 1" swivel snap hooks
- (2) 1/2" split rings
- A tape measure
- Ribbon on webbing in the length you'd like the strap to be plus 3". (I used 38", which gives a finished length of 35".)
Necessary Stitches
If you are new to machine sewing, you may want to practice these stitches on some scrap fabric before attempting your new camera strap.
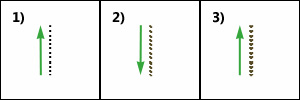
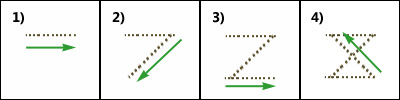
Figure 1: Triple Stitch
- Stitch forward about an 1".
- Next, backstitch the same length.
- Now, stitch forward the same length.
Figure 2: Box Stitch
- Perform a triple stitch.
- Turn piece diagonally ~45 degrees and backstitch.
- Next, perform another triple stitch.
- Turn piece diagonally again ~45 degrees. Close the "box" by stitching back to your original stitches.
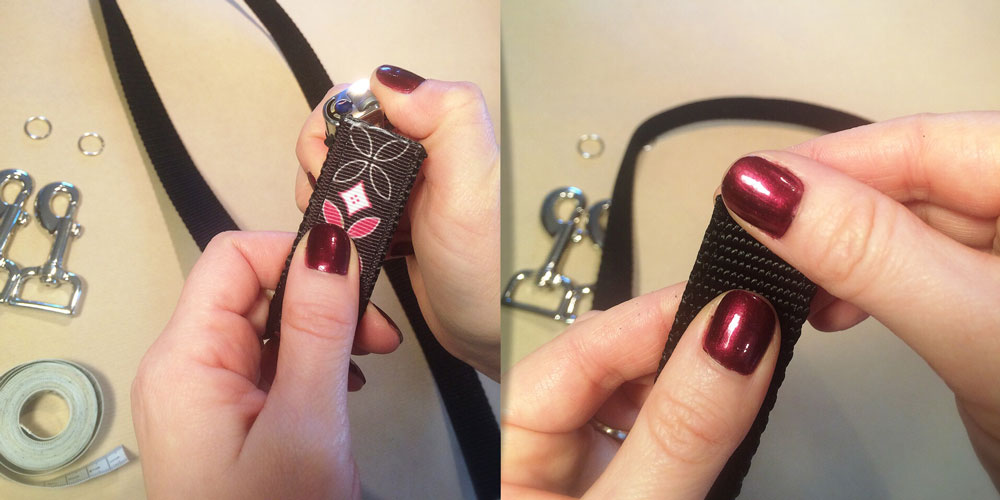
1. Seal The Edges
Cut your ribbon on webbing to whatever length you'd like the strap to be, plus 3". It's important to seal the ends when you cut any type of webbing so you prevent any fraying. To do this, simply hold a flame under the end of the webbing and move it along the cut edge, front and back until you see the webbing edges melting a little.
As soon as you remove the flame, wet your fingers and smooth the fibers down to get a nice rounded edge. You can also use pliers. Note: Be careful with the ribbon so as not to scorch it!
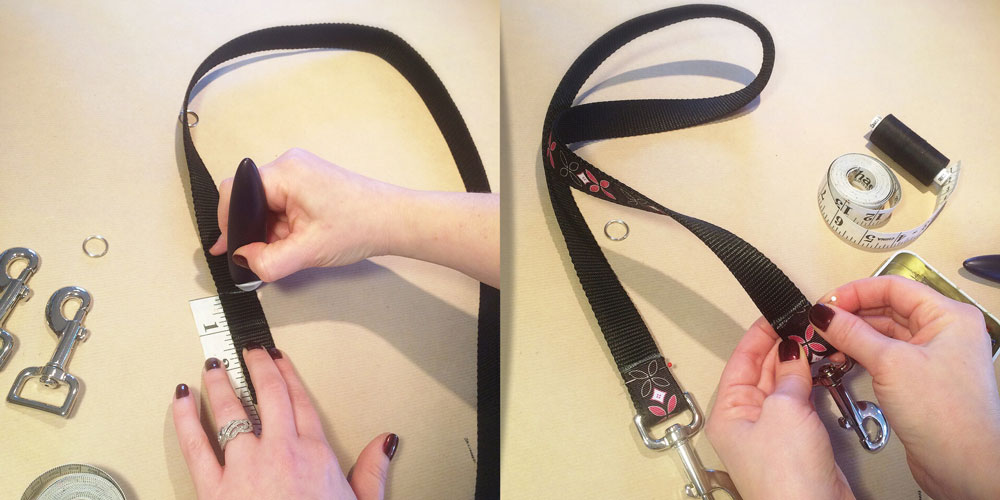
2. Mark The Webbing
Cut your ribbon on webbing to whatever length you'd like the strap to be, plus 3". It's important to seal the ends when you cut any type of webbing so you prevent any fraying. To do this, simply hold a flame under the end of the webbing and move it along the cut edge, front and back until you see the webbing edges melting a little.
As soon as you remove the flame, wet your fingers and smooth the fibers down to get a nice rounded edge. You can also use pliers. Note: Be careful with the ribbon so as not to scorch it!
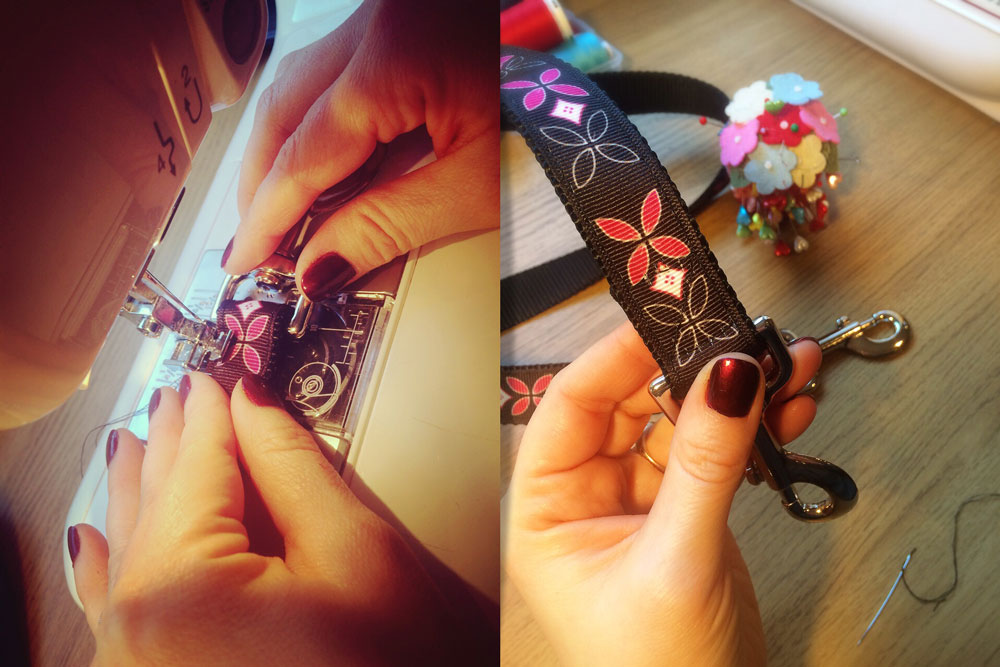
3. Perform A Box Stitch
Sew the edges shut. You can either do this by hand or use a sewing machine. For both, I would recommend a leather needle. (You can use a regular needle for hand sewing but you may want to use a thimble). You will need a tough machine needle as the double layer of webbing can be tough to stitch through.
Sew a box stitch (Figure 1) configuration to make it super strong. You don't want those straps going anywhere!
4. Assemble The Strap
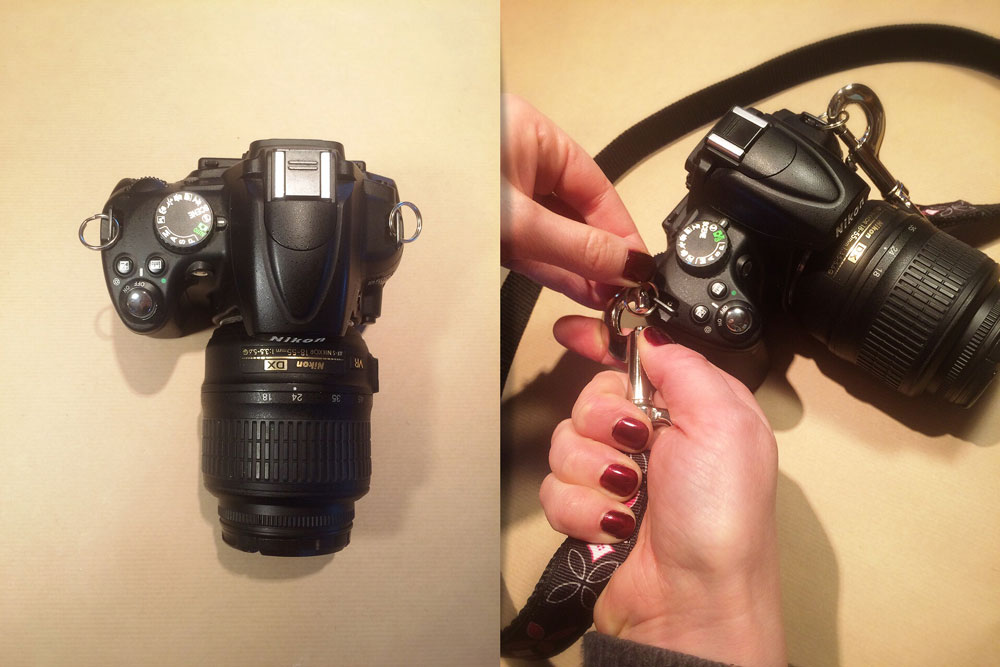
Remove the current camera strap from the equipment. Insert the split rings into the holes on your camera.
Place the swivel hooks into the split rings.
![]() Carol's Tip: We open a LOT of split rings and we use a split ring plier made just for that. To save your fingernails, you can also use a staple remover or a nail file to hold the split ring open. Emma suggested using a pair of small, pointed scissors which works well, too!
Carol's Tip: We open a LOT of split rings and we use a split ring plier made just for that. To save your fingernails, you can also use a staple remover or a nail file to hold the split ring open. Emma suggested using a pair of small, pointed scissors which works well, too!
And there you go! Only four steps to make something so quick and simple that looks great.
It's so easy you could make them in lots of different colors and patterns. This would be a nice addition to your online marketplace or to display at your craft fair booth.
Order Ribbon On Webbing
Country Brook Craft Supply has a great selection of ready-to-use ribbon on webbing. You can also create your own -- order webbing and stitch your own ribbon selections to it. As a reminder, D-rings, buckle, triglides etc. are sized by the webbing or straps they are meant to be used with. Make sure you double-check when you order. Remember, the Customer Service staff at Country Brook Craft Supply is always a good resource if you have questions.
Have you made anything awesome with the ribbon on webbing or swivel hooks? We'd love to hear about it - or even see it. Any new tutorials you'd like us to cover? Let us know!