How To Make A Backpack Of Your Own Design
January 13th, 2015 - Posted By Katie Allen
Have you ever picked up a cute fabric backpack in a retail setting and thought to yourself I could make this … if I only had a simple backpack pattern? Chances are you also had a few ideas of how to make it your own design, didn't you?
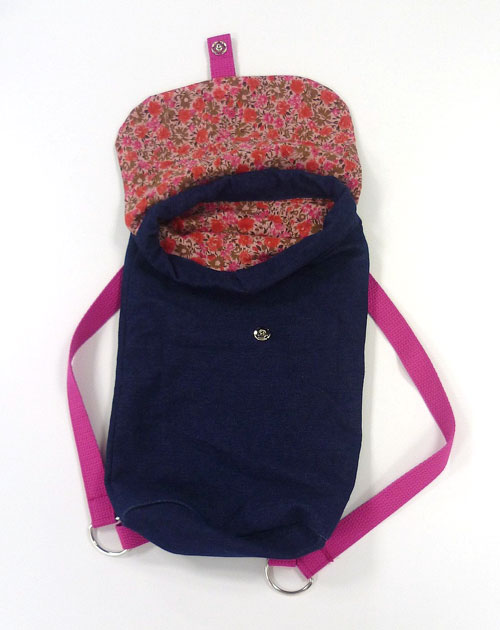
Backpacks are enjoying a surge in popularity these days. No longer just for school kids or hikers, a small backpack is just the thing to carry your gear while your hands remain free. This lightweight, do-it-yourself backpack has the sturdiness of denim, contrasting cotton webbing straps, and extra-large D-rings. The drawstring at the top and a flap with a snap closure keep belongings inside.
By all means, stick to the look of this handmade backpack if that works best for you. You can also express your creativity by changing the lining and strap color to make your own fashion statement. Mix it up for boys by going with a solid or striped lining and a masculine strap option. Or up the decorative look with a monogram, an embroidery blank or even the glitter of sequins and rhinestones on the flap!
You'll find this handmade backpack an intermediate-level sewing project with user-friendly instructions and pictures to guide you through the process. Let’s get started!
Gather Your Project Items:
- Approx. 2 1/4 yds of 1" heavy cotton webbing for straps
- Denim fabric
- Patterned cotton fabric for the lining
- Four 1 1/2" D-rings
- Size 24 press stud
- Sewing thread
- Needle
- Straight pins
- Sewing machine
- Safety pin
- Chopstick/knitting needle for turning the drawstring
- Erasable pen
- Scissors
- An iron
- Tape measure
1. Cut The Pieces For The Bag
- First, prepare the main body of the bag. Cut two 15" x 11" rectangles from the denim (this includes a 5/8" seam allowance), and two 15" x 11" rectangles from the lining fabric.
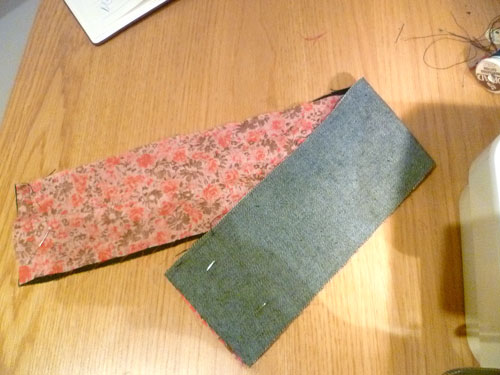
2. Make The Flap
- Cut an 11" wide x 8 1/4" high rectangle from the denim. Fold the rectangle in half widthwise and pin. Draw a curve on the top open corner of the fabric and cut. Unfold the fabric.

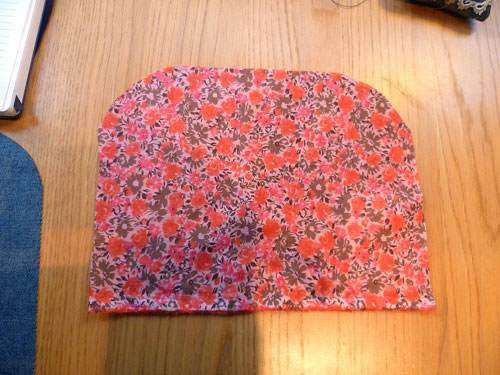
- Use this as a template to cut a shape from the lining.
- Next, make the strap. Cut 5 1/2" of cotton webbing and fold it in half. Pinch the webbing to make a sharp fold. Unfold. Place half of the press stud in position on top of the strap, just above the fold mark. Stitch in place - you can double the thread for extra strength.
- Fold the webbing in half again and sew firmly across both layers just above the stud.
- Place the two fabric shapes right sides together, with the lining piece on top, and pin. Tuck the webbing strap inside, in the middle of the curved edge. Make sure that the raw ends of the strap meet the edges of the fabric, and that the stud is facing upwards. Pin in place.
- Stitch around the edge of the flap piece, with a 5/8" seam allowance. Don’t forget to leave a gap in the top edge for turning.
- Cut little notches out of the curved edge, avoiding snipping the stitches, to remove any bulk.
- Turn the piece right side out. Tuck in the raw edges of the gap and press. Stitch the gap closed. Press with the iron.


3. Make The Straps
- Choose a denim piece to be the back of your bag, and place right side up.
- Customize the length of the straps. They will need to go from the top of your shoulder blade, over the front of your shoulder, and around to your back at waist level. Add 1" on each end for looping through the D-ring. Cut two straps.
- To make straps, zigzag both ends to stop fraying. Put one end of the strap through the straight side of the D-ring and fold 1" back on itself. Sew a square to fix in place. Repeat at the other end of the strap.
- Repeat step 2 with the remaining strap.
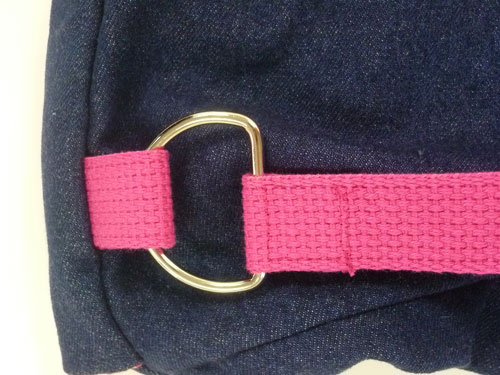
- Next, make the loops to hold your straps. You will need four 3" lengths of webbing. Zigzag the ends to prevent fraying.
- For each loop, put the webbing through the curved side of the D-ring and fold it back on itself. Place the ends of the webbing on the shorter side of the rectangle, 2" in from the edge. Pin and stitch in place. Repeat on each corner of the bag. You should now have two straps in place.
4. Make The Bag
- First, stitch the denim outer bag pieces together.
- Place your flap piece on top of the back piece of your bag, denim right sides together, align the edges. Pin in place and stitch across the top.
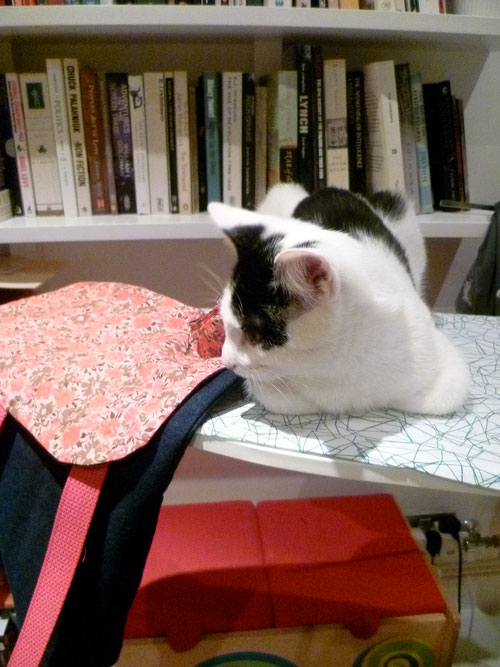
- Place your other denim rectangle on top, right sides together. Tuck in the flap piece and the straps and stitch down each long side of the rectangle, being careful not to catch the flap piece. If necessary, remove cat from ironing board. Press open
5. Make The Base
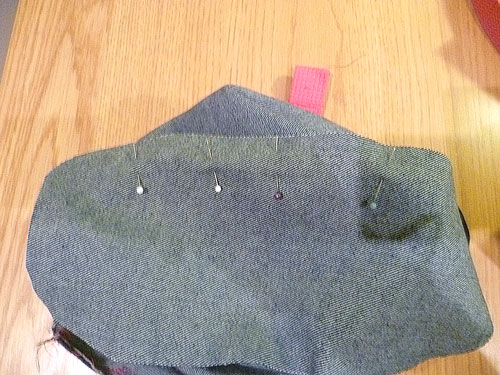
- Make an oval shape for the base of the bag. Cut a 15" x 5" denim rectangle. Fold it in half as before and cut a curved edge off the two outer corners. When you unfold it, you will have an oval.
- Use the denim piece as a template to cut out a lining base
- Pin the denim base to the bottom of the rectangular denim shape you have made.
- Make sure the right side of the denim is facing inwards.
- Stitch all the way around, leaving a 5/8" seam allowance. Trim any excess and zigzag the edges. Take out the pins.
- Turn the bag right side out.
6. Make The Lining
- Now make a lining bag to fit inside the denim bag. Place your two lining pieces right sides together and pin. Stitch the long sides. Attach the base as above. DON’T turn the bag right side out.
- Tuck it inside your denim bag, lining up the tops of the bags. It may help to tack around the top edge to keep things together.
7. Make A Channel For The Drawstring
- Cut 3.5" x 21 1/2" rectangles of denim fabric and lining fabric.
- Place right sides together and pin.
- Stitch all the way around the edges, leaving a 5/8" seam allowance. Leave a gap.
- Snip off the corners. Turn through the gap, tucking in the raw edges. You may need the chopstick to push out the corners. Press flat, and stitch the gap closed.
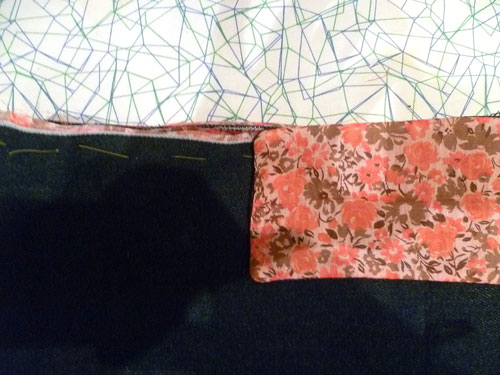
- Now pin the channel to the top edge of the bag. Starting in the center front of the bag, place the top edge of the channel piece, denim side down, against the top edge of the bag.
- Pin all the way around. Stitch in place.
- Now curve your channel piece over the top of the bag. This will create a channel for your drawstring and also hide any raw edges.
- Place the edge of the channel a little below the previous seam to avoid everything getting too thick. Pin in place and stitch.
![]()
Note: the front edges of the channel should meet at the front and even cross over a little. Don't worry if the fabric gets a little twisted.
8. Make The Drawstring
- Cut a 27 1/4" x 1" rectangle from lining fabric. Fold in half lengthwise and press. Open up, and fold one outer edge into the center fold. Press. Repeat on the other side. Now fold both folded edges in together. Press all the way along, tucking in the short raw ends of the drawstring as you go.
- Stitch all the way along the folded edge, as straight as you can.
- Now put a safety pin through one end of your drawstring and thread it through the channel of your bag. Tie a couple of knots in each end to keep the drawstring from disappearing inside the channel. You might also like to sew on a scrap of denim fabric or add a decorative bead.
9. Finish the Bag
- Lastly, stitch the other half of the press stud on the front of the bag.
- Turn bag right side out and press seams all around.
- Trim loose threads.
- Feed the cat.
For a crafter or a DIY, there is nothing so satisfying as creating something with your own skills and tools instead of buying it "ready-made." Now that you have the tutorial you need, make a decorative handmade backpack for yourself or someone else. It's ideal for a home economics class or the answer to "Mom, I'm bored!" Plus, there's the added bonus of sneaking in some fraction/metric work in a subtle way. You can even make it a bit more challenging by using our easy toggle to display either metric or imperial measurements as a different way of looking at the sewing world at large.
We love seeing and sharing pictures of completed projects made using our tutorials as a starting point. We invite you to capture your creativity and share it with Country Brook Craft Supply on Facebook, follow us on Twitter @countrybrook, and look for our boards on our Pinterestboard Good Job!. Remember to use the convenient buttons at the top of the page to share this tutorial with your friends and followers.
About Katie Allen:

Katie Allen is a crafter, copywriter and journalist based in arty Peckham, south London.
She likes making things so much that she wrote a book about it: Just Sew Stories and she also edits Hoop-La! magazine in her spare time. She finds inspiration in charity shop finds, anything to do with William Morris and spending (far too much) time on Pinterest. Find more of her work here.